

|
|
 |
Guest - Not logged in | ||||||||||||||||||
Reviews > Packs > Internal and External Framed Backpacks > Dakine Outtabounds Pack > Test Report by Ken BigelowDaKine
Outtabounds Pack
Test Report Series by Ken Bigelow Initial Report– November 13, 2008 Field Report - January 26, 2009 Long Term Report - March 26, 2009  Name: Ken Bigelow Age: 30 Gender: Male Height: 5' 8" (1.7 m) Weight: 175 lbs (79 kg) Shoe Size: Men’s 10 (US) Email address: krb84108 (at) yahoo (dot) com Location: Salt Lake City, Utah, USA Backpacking Background: My adventures vary in length from a weekend to over two weeks. I am shifting my backpacking style to a lightweight approach. I use hammocks and lightweight tents to reduce weight. From spring through fall I typically backpack in the mountains or desert, while in winter I often go snowshoeing. I typically see a wide variety of climates ranging from -5 F (-20 C) with snow to 90 F (32 C) and sunny with just about everything in between. Initial
Report 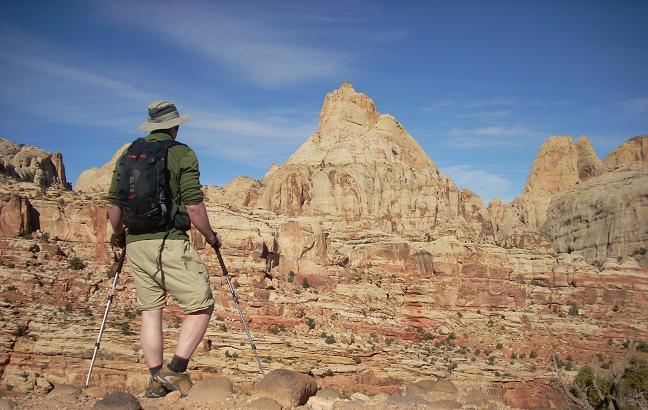 Product Information:
Product Description & Initial Impressions: The DaKine Outtabounds pack is a snow sports backpack with a plethora of features for winter backcountry travel. The pack arrived with suggested retail price tag and a hangtag that lists the pack’s features (with pictures of a few of them) and warranty information in multiple languages. The pack appears to be very well made and I can see no defeats in the workmanship whatsoever. I’d say that I received what I expected based on looking at DaKine’s website. The non-detachable lid has two zippered pockets. The top lid pocket is pretty standard, but the lower lid pocket is lined with fleece and I suspect my goggles will find a permanent home in here (I’ll see how well that works in the field). The right and left side of the Outtabounds pack each have two compression straps and an exterior nylon pocket with adjustable cordlock. Daisy chain webbing runs down the back on both the right and left side and DaKine included two Velcro straps for attaching gear to them. The left side of the pack has a zippered pocket about mid height that holds a very thick, gray webbing handle. This allows users to carry the pack similar to a briefcase. 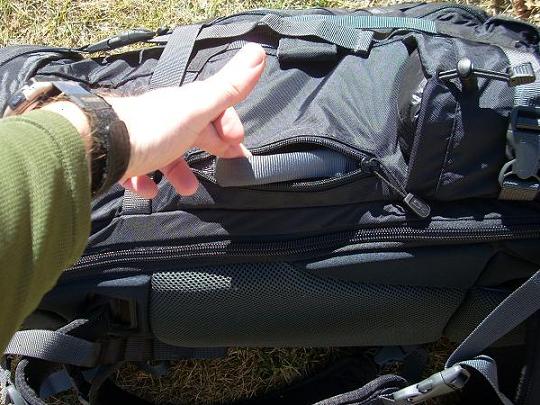 Pack Carrying Handle 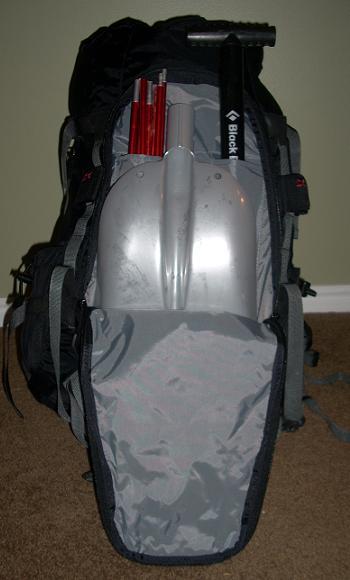 Snow Tool/Shovel Pocket 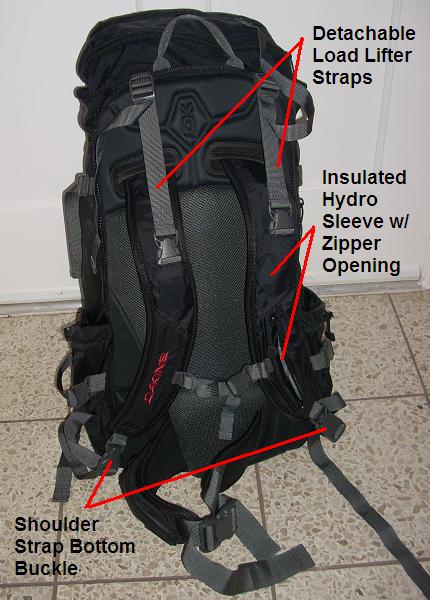 Insulated Hydro Sleeve & Detachable Shoulder Load Lifters The waistbelt has a zippered, waterproof, fleece-lined pocket on the right side. I love hipbelt pockets so I’m happy to see one on this pack. I am concerned that the zipper is the only one on the entire pack without a pull tab. I find this odd as I suspect (and I’ll have to check this during testing) that the pocket may be more difficult to operate with gloves on without a pull tab (I’m basing this on previous experience and will check to see if my theory holds true). A plastic framesheet with a removable aluminum stay (down the centerline of the framesheet) makes up the remainder of the pack’s suspension system. The padding on the exterior of the pack (the portion that rests against my back) is thick, soft and has a dotted/meshed pattern not uncommon among other traditional packs I’ve owned. The main compartment to the Outtabounds pack can be accessed in one of two ways. Under the lid there is a drawstring cord where the pack can be loaded through the top. The other way to enter the main pocket is through a zipper that runs over the top and down the sides of the framesheet. This allows a back entrance for retrieving/storing gear. At the bottom of the main compartment there is a mesh strip of fabric with a drawstring cord for keeping the gear more secure when entering the pocket through this manner.
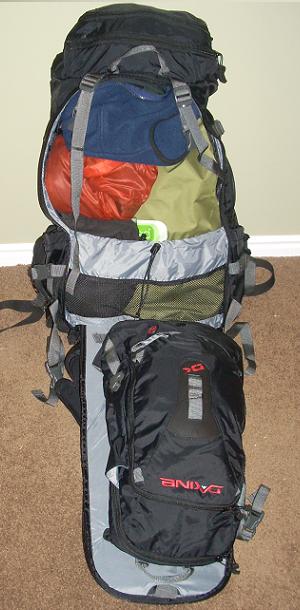 Back Panel Loading & Deployable Shuttle Pack
One of the many unique features of the Outtabounds is a deployable shuttle pack. A zipper track runs three quarters of the way around the framesheet of the main pack which is used to remove or insert the shuttle pack (also used as a previously mentioned back entrance). To get to the shuttle pack I have to unzip this framesheet perimeter zipper, unclip the base of the shoulder straps and unclip the main pack’s straps that tie into the top of the shoulder straps (also I have to ensure hat the waistbelt buckle is unclipped). The shoulder straps then slide through two horizontal slits in the top of the framesheet and the waistbelt slides through two vertical slits near the bottom of the framesheet. The larger main pack and the smaller shuttle pack have the same shoulder straps and waistbelt. The shoulder straps then buckle into webbing straps located on the day/shuttle pack, which are similar to the ones on the main pack. The smaller shuttle pack lacks an internal frame, load lifters and obviously has a much smaller volume. This is a feature I am really looking forward to taking advantage of. Essentially I get two packs in one! The shuttle pack has a main compartment with a clip at the top (on the inside) and a mesh strip along the inside. Both are designed for accommodating a hydration bladder. The main compartment to the shuttle pack is accessed through use of a zipper that runs along the right side and top of the shuttle pack. The shuttle pack also has a smaller zippered pocket on the back which runs around the top and down both sides. This pocket has a small drain at the bottom of it as well as a small, zippered mesh pocket that runs along the top inside of the pocket. I have seen similar zippered pockets on numerous packs and typically store my keys, identification cards, etc inside them. 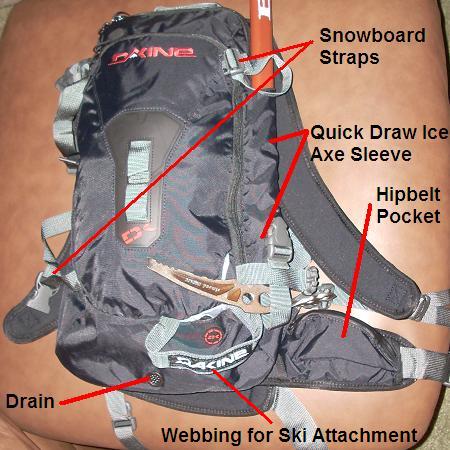 DaKine Outtabounds Shuttle Pack The right side of the shuttle pack has an exterior quick draw ice axe sleeve which is just a vertical nylon sleeve with a gray, plastic buckle at the bottom of it. The bottom right of the shuttle pack has a Velcro operated pocket/pouch that houses a thick, gray webbing strap. This strap is designed to be used in conjunction with a gray, plastic buckle on the upper left side of the pack to strap skis diagonally to the pack. Vertical Snowboard Carry: Both the larger main pack and the shuttle pack have four straps (each strap has either a male or female end of a plastic buckle on it) that are designed to strap a snowboard vertically to the pack. On both packs the straps can be hidden so they are not seen and hanging loose when not in use. On the shuttle pack the four corner strap ‘pouches’ are located on the back pocket (two at the top, two at the bottom). Gray webbing straps with buckles hide in these until I pull them out to strap my snowboard to the pack. They were easy to find and something I’m really looking forward to using. 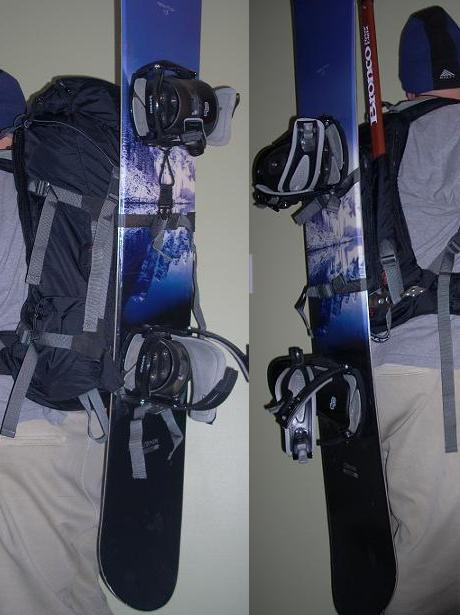 Snowboard on the DaKine Outtabounds Pack (Left) & Shuttle Pack (Right) Summary: The DaKine Outtabounds pack has plenty of features that will hopefully accommodate most, if not all, of my outdoor winter activities. I essentially get two packs in one with both being able to carry my snowboard and winter gear. An insulated hydration sleeve will hopefully allow me to use my hydration bladder without the fear of it freezing right away. The Outtabounds pack is noticeably heavier than DaKine lists on their website. The waterproof, fleece-lined hipbelt pocket is nice, but is lacking a pull tab. I am looking forward to testing this pack and hope that is allows me to be as versatile as it is this winter. Things I like
so far:
January
26,
2009
Over the past two months I have used the DaKine Outtabounds Backpack on a three night trip in Zion National Park, a three night trip in the San Rafael Swell, three separate overnight trips in the Wasatch Mountains, a three day basecamp in Capital Reef and another three day basecamp in the San Rafael Swell. I also used it on multiple day hikes in the Wasatch Mountains and on every trip I take to the local ski resorts. I’ve seen rain, snow, sunny days, cloudy days and strong wind gusts. Temperatures have been between -5 F/-20 C and 60 F/16 C and the elevations have ranged from 4,200 ft/1,300 m to 11,000 ft/3,400 m. I’ve hiked in deep powder snow, on slick snow/ice, on rocks and through dirt and mud. Field Performance: After initially seeing the Outtabounds Pack I envisioned two uses – snowsports and basecamping. For basecamping the Outtabounds pack works really well. One of the first trips I took with the Outtabounds pack was down to Zion National Park. Exploring the Kolob Canyons region of the park can be very fun, but does require basecamping to explore the area thoroughly. I backpacked into the heart of the area and set out on dayhikes the next two days. Using the shuttle pack for dayhiking out of basecamp is truly a joy I do not feel I can properly convey. I love hiking with a pack on my back and not having to carry water, food, rain gear, etc in a detachable lid, a pack designed for a substantially higher load or some other method. The deployable shuttle pack makes exploring out of a basecamp much easier and more comfortable. I have the comfort of a regular day pack and can pack like I would for a typical dayhiking trip. 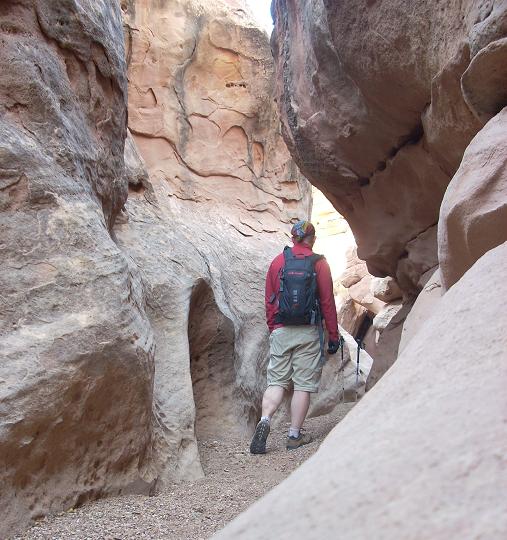 Dayhiking out of Basecamp One thing I believe could be improved upon is the waistbelt. It is great as is when using just the shuttle pack, but when I use the Outtabounds pack with an overnight load I am unable to get a good load transfer to my hips and most of the weight ends up on my shoulders. I believe beefing this up would make a dramatic difference and add a bit more comfort when carrying heavier loads. Another issue I have is the excessive length of the compression straps on the shoulder straps (not the load lifters). Their length leaves them dangling quite low. When backpacking this has only been a very minor annoyance and not really worth mentioning (as of yet), but this has become an issue while snowboarding. After ratcheting my feet into my bindings I always place my hands on the snow and lift myself up with my hands pressing down on the snow covered ground. A piece of the compression strap almost always becomes trapped under my hand and I actually end up holding/knocking myself down. This is an issue on both the Outtabounds and the shuttle pack. I suspect I will trim the shoulder compression straps on both the Outtabounds and the shuttle pack after this test is concluded. The shoulder straps themselves, on the other hand, work really well. I love them whether I am using the Outtabounds or the shuttle pack. The padding feels really comfortable on my shoulders. With heavier loads I can feel my inability to properly transfer the weight to my waist after a few hours, but I still feel that the shoulder straps are designed well overall. 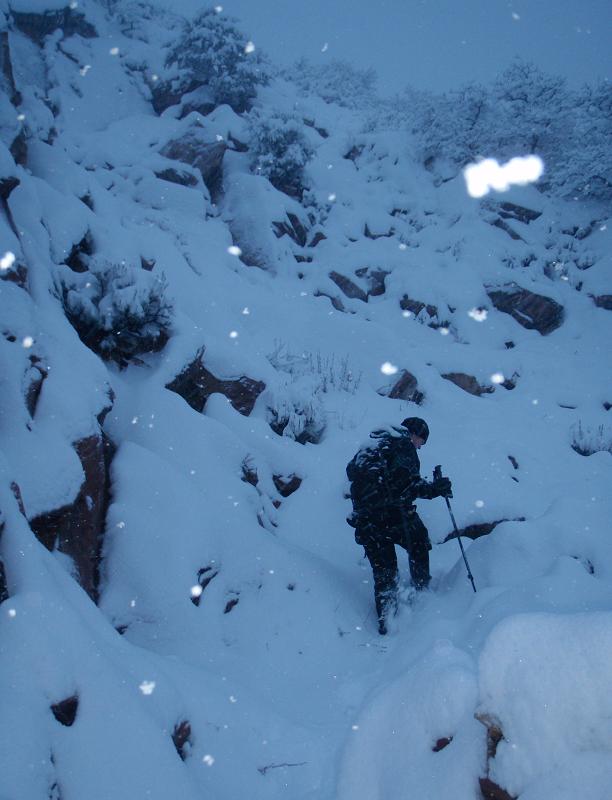 Hiking with the Shuttle Pack in a Snowstorm 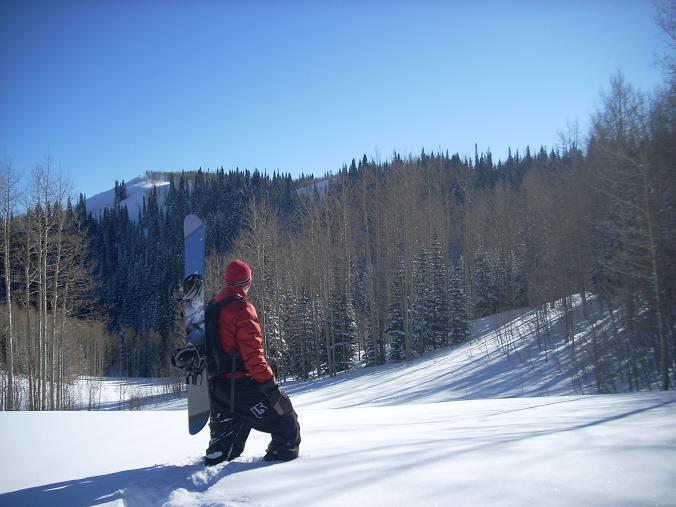 Catching Fresh
Powder & Some First Tracks
I can also attach my snowshoes to the pack which really
came in handy at the first of the winter season when the lower
elevations
lacked substantial snow while the summits were at least waist deep. I was able to carry the snowshoes until I
needed them and then used them for flotation to prevent me from
postholing.
This is a great thing for me as postholing takes up a ton of energy and
slows
my pace quite a bit. I do not ski, but
the ski attachment straps have come in handy for latching my trekking
poles to
the shuttle pack when I ride my snowboard down. I find myself able to actually keep reasonably hydrated thanks to the insulated hydro zipper. In the winter I have typically had to switch to canteens inside an insulated pocket to keep my water from freezing. The problem is I never seem to drink enough when I use canteens as accessing them takes time and requires more effort than drinking from my hydration bladder (which is my typical method of water hauling from spring through fall. The insulated sleeve keeps my mouthpiece from freezing and as long as I remember to zip it up after using it I can drink whenever I am thirsty all day long. When the pack is on the ground (as opposed to next to my body while wearing it) the mouthpiece does freeze inside the sleeve below approximately 20 F/-7 C. I would like to change the zippers on the back pockets to waterproof. During snowstorms I have a lot of snow collect on the top of the pockets. Anything stored just on the other side of the zipper becomes wet. I have stored my insulation layer there before so getting my insulation layer wet was not exactly a good thing and I would think waterproof zippers would go a long way in preventing this from happening. 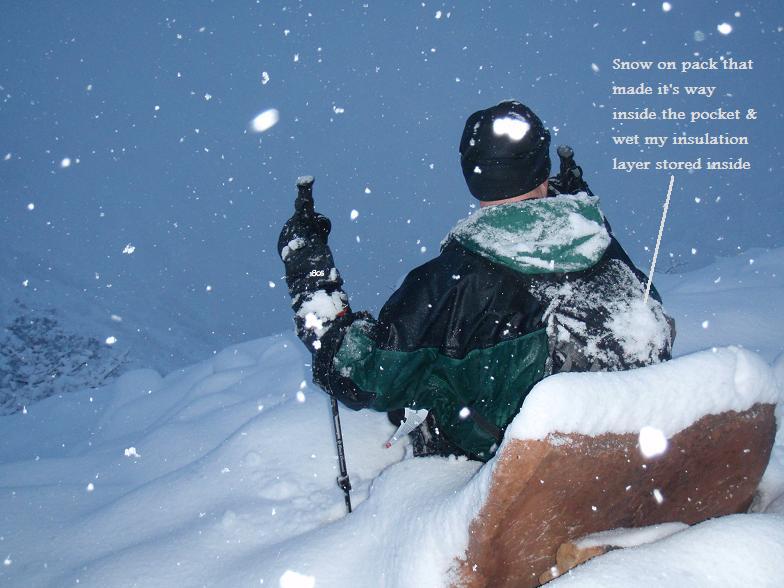 Snow
Collecting on Non-Waterproof Zippers
Summary: I like the Outtabounds pack for snowboarding, snowshoeing and basecamp backpacking. It has a lot of good features that come in handy like the insulated hydro sleeve, soft, well padded shoulder straps and ability to strap my snowboard, snowshoes or trekking poles to the back. I still would like to see DaKine beef up the waistbelt, shorten the shoulder compression straps and maybe make at least the rear pocket zippers waterproof. I look forward to using the Outtabounds over the next two months of testing. Things I Like:
March
26, 2009
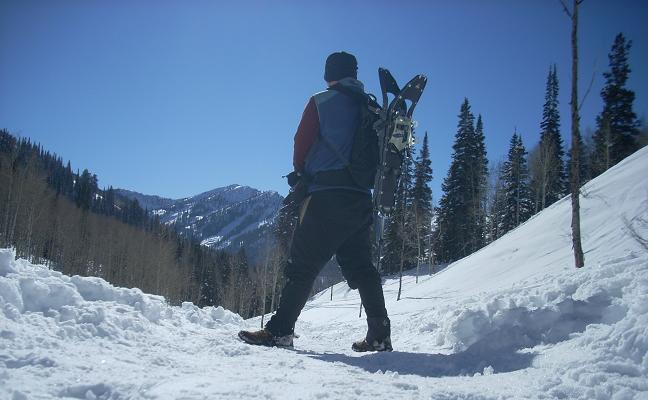 Long Term Testing Conditions: Over the final two months of testing I have used the DaKine Outtabounds a total of four nights backpacking in the Wasatch Mountains and the High Uintas. I have also used the Shuttle Pack six days in the Wasatch Mountains and Fish Lake National Forest. Elevations have been between 4,000 ft (1,200 m) and 9,200 ft (2,800 m). Temperatures have been between 10 F (-12 C) and 60 F (16 C). The terrain has been primarily on snow, ice, rock and muddy trails. Long Term Report: The Outtabounds pack is an excellent pack for transporting either my snowboard or my snowshoes. Both it and the shuttle pack have seen quite a bit of duty in this capacity. All the buckles are easily accessible and they tuck out of the way when not in use so they do not become snagged on branches while hiking. The pack's carrying handle has also come in very handy. Whether basecamping or just loading my gear in a vehicle it is a nice feature for helping me transport gear over short distances without having to throw the pack on my shoulders to get through narrow doors. 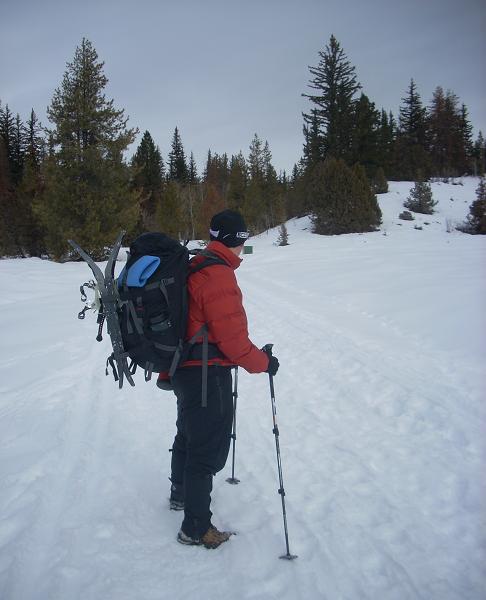 Carrying Snowshoes
The Snow Tool/Shovel Pocket in the Outtabounds Pack has been very useful for me. I find it a great organizing feature for all my gear (depending on the weather) such as snow shovel, crampons, traction aids, probes, snow stakes, tent poles, toilet paper (in a plastic bag), glow stick, first aid kit, emergency bivy sack and emergency hand warmers. I have had minor problems packing my snow shovel in and zipping the pocket up if the rest of the pack is already full. The volume of the pack compresses the interior handle sleeve tight so it does not go down all the way and leaves part of the handle extruding from the pocket. As long as I remember to pack the shovel prior to filling the main compartment then it is no problem at all. The DaKine Outtabounds pack and the shuttle pack have held up very well over four months of testing. I have scraped the packs over rock and ice and neither has any damage as far as I can tell. There are no holes and I do not seem any loose or frayed threads. The zippers still slide just as well as when I first received it. Although one of the pull tabs came off during testing I was able to put it easily back on. All the clips/buckles and webbing are still perfectly intact and operating normally. Summary: The DaKine Outtabounds Pack is a useful resource for me when hauling snowshoeing and snowboarding equipment into the backcountry. It has multiple useful features both as a backpack and a daypack. I still love the insulated hydro sleeve and the hipbelt pockets but would still like to see shorter shoulder compression straps and a beefier hipbelt. I plan on using the DaKine Outtabounds Pack in the years ahead. Things I Like:
This concludes my Long Term Report. Thanks to DaKine and BackpackGearTest for allowing me the opportunity to test the Outtabounds pack. Read more reviews of Dakine gear Read more gear reviews by Ken Bigelow Reviews > Packs > Internal and External Framed Backpacks > Dakine Outtabounds Pack > Test Report by Ken Bigelow | |||||||||||||||||||
