

|
|
 |
Guest - Not logged in | |||
Reviews > Stuff Sacks > Compression Sacks > SealLine Compression and Cinch Sacks > Test Report by Alyssa KimberSealLine Compression and Cinch Bags
Test Series by Alyssa Kimber Tester Information Name: Alyssa Kimber Age: 25 Gender: Female Height: 5' 10" (1.8 Meters) Weight: 130 Pounds (59 Kilograms) Email address: alyssakimber at hotmail dot com City, Province, Country: Fernie, British Columbia, Canada Backpacking Background: I started backpacking two years ago after moving from the prairies to the Kootenay region of British Columbia. I’m relatively new to backpacking but I have significant outdoors experience having enjoyed camping and day hiking for many years. My trip length is generally one to three nights and ranges from prairie hikes to mountainous terrain. I am a 4-season hiker and typically a 3-season backpacker. My pack weight varies depending on the trip, but I tend to sacrifice weight savings for comfort. Product Information & Specifications Manufacturer: SealLine Year of manufacture: 2019 Manufacturer web site: https://www.seallinegear.com/ Blockerlite Compression Cinch Sack (5L) Manufacturer's listed specifications:
Manufacturer's listed specifications:
The compression dry sack is described on the SealLine website as a waterproof, ultralight dry sack for protecting and organizing gear. The two different bags are apparently composed of the same material (20D silicone- and polyurethane-coated nylon) so I'm not sure what makes one sack waterproof and the other sack splash proof. The compression dry sack has a roll-top closure and stiffening strip to ensure a waterproof closure and fully welded seams for durability. The compression dry sack also features the flat-sided rectangular shape for efficient packing. The compression dry sack is different from the compression cinch sack in that is also has a purge valve. The purge valve vents excess air trapped within the sack without compromising water protection. Venting trapped air prevents the bag from "ballooning". Below is a photo of the sacks and the packaging. 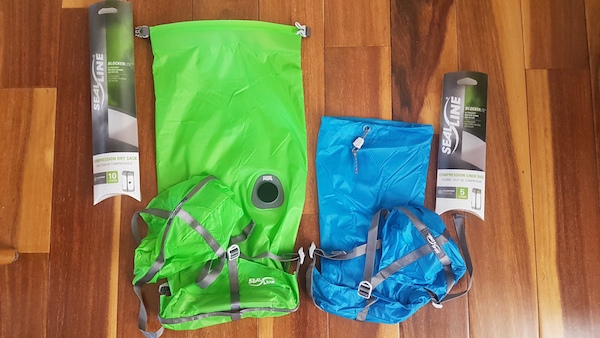 Reading the Instructions The instructions that came with the compression cinch sack include pictures and a few short descriptions: 1. To open the sack: Firmly pinch the sides of the cord lock and pull away from the opening. 2. To close the sack: hold the end of the drawstring cord and push the cordlock towards the opening until it cannot be cinched further. 3. To compress the sack: Place compression cap over the cinch closure. Make sure straps are not twisted. Compress the sack by evenly pulling on each of the four straps, keeping the top cap centered. Do not over-tighten. The instructions for the compression dry sack are as follows: 1. Press and hold the top sealing strips together, making sure they are wrinkle free. 2. Push down on the sack to "burp" any trapped air. Tightly fold the top over a minimum of 3 times. 3. Connect the buckle in the direction opposite to the direction the material was folded. 4. Place compression cap over the roll-top closure. Make sure straps are not twisted. Compress the sack by evenly pulling on each of the four straps, keeping the top cap centered. Do not over-tighten. The instructions picture air venting from the purge valve while compressing the sack. Cleaning instructions: After each use, sacks should be cleaned and aired out. Dirty sacks can be washed with a soapy sponge and rinsed, allowing them to air dry. Store clean sacks completely dry, inside out. Insect repellents and solvents should not make direct contact with the sacks. Trying It Out I tried the 10 L compression dry sack out with my sleeping bag as I was eager to see if it would fit. I normally use a 20 L compression sack for my sleeping bag so I was not optimistic that it would work and unfortunately, the bag was too small, but only just. The purge valve actually worked really well to vent the air and get more compression than usual, even without the closure rolled down. I could fit my sleeping bag in but could only roll the closure over one time which doesn't work to keep the bag closed. Still, I was impressed that it almost fit, considering I usually use a 20 L sack. I tried out both of the sacks with some clothing to get an idea of how much compression I could get. I was impressed with the compression of both sacks, especially the dry sack with the purge valve. The purge valve has the same effect as a vacuum seal, aiding greatly in the compression. The compression straps were easy to pull and adjust. The bags did not turn out as "flat-sided and rectangular" and I was expecting from the website description, but it could be the way I packed the sacks a bit haphazardly. See photos below of the sacks compressed and uncompressed. The water bottle is for size comparison.  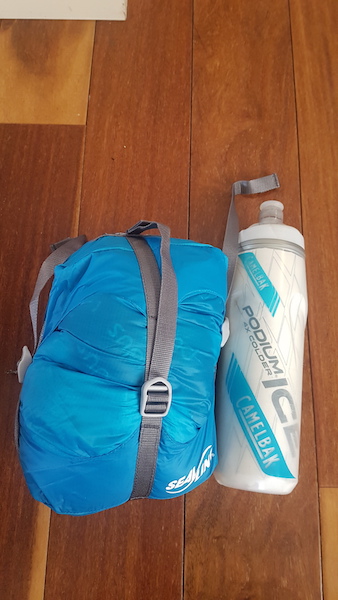 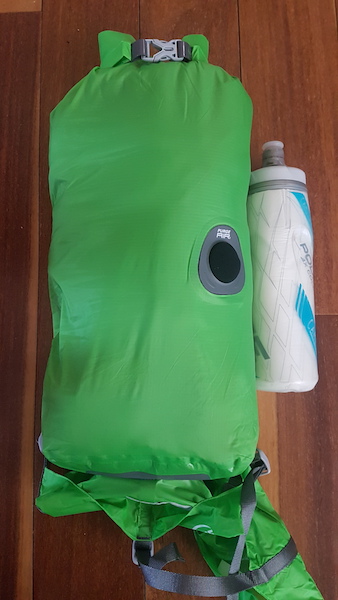  Initial Impressions I am very impressed with both sacks and am eager to try them out on the trails. The bags are light and appear very durable. They are self-explanatory in their use and the straps are easy to maneuver. The sacks do a great job at compressing clothing and the purge valve on the dry sack is an awesome addition that aids in compressing the sack even further. I will note that the dry sack weighed almost twice as much as what is listed on the website, which, although still light, appears to be misleading. Long-term Report Test Locations and Conditions Location of Trip #1: Tunnel Creek Hut near Fernie, British Columbia Length: 2 days, 1 night Distance: 10 km (6 mi) Pack Weight: 30 lb (13.6 kg) Weather: Partly Cloudy Precipitation: None Temperature: -10 to 0 C (14 to 32 F) Terrain: Hard, crusty snow in subalpine forest Elevation: 1000 to 1715 m (3300 to 5600 ft) Location of Trip #2: Bikepacking around Lake Koocanusa, Montana Length: 2 days, 2 nights Distance: 215 km (134 mi) Pack Weight: 30 lbs (13.6 kg) Weather: Mainly Cloudy Precipitation: about 5 mm (0.2 inch) Temperature: 5 to 15 C (41 to 59 F) Elevation: 650 to 900 m (2100 to 3000 ft) Location of Trip #3: Basecamping Coeur d'Alene, Idaho Length: 2 days, 2 nights Distance: N/A - basecamping Weather: Partly cloudy Precipitation: about 10 mm (0.4 inch) Temperature: 20 C (68 F) Location of Trip #4: Sunshine Coast Trail near Powell River, British Columbia Length: 5 days, 4 nights Distance: 84 km (52 mi) Pack Weight: 30 lb (13.6 kg) Weather: Sunny Precipitation: None Temperature: 7 to 28 C (44 to 82 F) Terrain: From rocky coastline to interior old growth forest to rocky alpine conditions Elevation: 0 to 1200 m (0 to 3900 ft) Performance in the Field During the long-term test period I used the sacks on two backpacking trips, a bikepacking trip, and a base camping trip. I always used the 10 L sack for packing my clothing and I used the 5 L sack for additional clothing like socks, underwear, and sports bras, or toiletries. The bags were packed either in my backpacking bag or in my bikepacking bags. The bags were super easy to use and worked very well to pack down my clothing and to help organize my things in the case I used the sack to hold my toiletries and extra accessories. I really liked that the bags cinched down to a rectangular shape with relatively flat sides. It made the bags easy to pack in my backpacking bag and reduced wasted space from rounded stuff sacks. I've included a couple photos below of the sacks packing in my backpacking bag and the 10 L sack on top of my bikepacking bag, for size comparison. 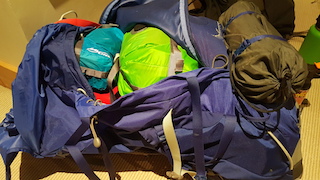 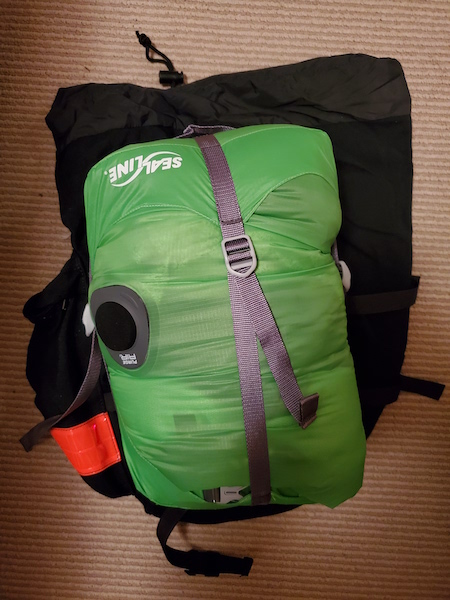 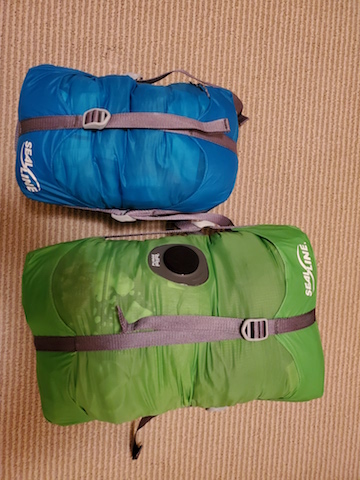 I encountered quite a bit of rain on our bike packing trip and the 10 L dry sack worked very well to keep my clothing dry. The purge valve worked excellent to remove any excess air from the dry sack while cinching. Both bags are very durable, showing no signs of wear on the bag or straps after the long-term test. One thing I found slightly cumbersome was that the compression straps on both bags had to be loosened fully in order to get the "cap" around the top of the bag, and then re-tightened to compress the sack. This is in contrast to another compression sack I own which has buckles on two of the four compression straps that are easy to snap together or apart. I find this configuration makes it easier to get the "cap" around the top of the bag. I really liked these sacks and I look forward to using them in the future! Summary Pros 1. Durable 2. Easy to use 3. Rectangular shape reduces wasted space 4. Dry sack keeps things dry from the rain! 5. Keeps items organized in my backpack Cons 1. "Cap" is a little cumbersome to pull over a packed compression sack This concludes my long term report. Thank you SealLine and BackpackGearTest.org for the opportunity to test this product. Read more reviews of SealLine gear Read more gear reviews by Alyssa Kimber Reviews > Stuff Sacks > Compression Sacks > SealLine Compression and Cinch Sacks > Test Report by Alyssa Kimber | ||||